Friday, 23 January 2015

Crafting this week

So I'm still beavering away crafting at home while the shop is out of action. Progress is being made with the old floorboards taking out and the gap filled with concrete ready to tile on to. I'm sad to see the floor change but it would be unfeasible to replace it with the same encase it floods again.
So this week I have been carrying on with my card making. Up first a break from the stamping as I found a paper pack in my stash from an issue of Craft Seller magazine and decided to make some cards using it.

 A selection of square cards in two different sizes the larger ones are kraft brown colored bases. I always like to punch a real hole in the tag shapes and add a bit of ribbon or paper strip to complete the effect.
And some rectangular ones these cards have a range of styles and sentiments and will offer a choice from the stamped one which I have been making. I enjoyed playing around with the layering and adding touch like the strips of quilling paper. I seem to have got quite a stash of it in different colors from various magazine free gifts but am not a great quiller so I am glad to have a use for some of it.  

The next set is using some of the card bases from my Tilda card background paper pad. I have embellished these double sided printed bases with stamps in complimenting colors, printed tags and mini bunting pendants. I do like how they have turned out with a real vintage feel.


 I then went back to my stamping after seeing some inspiration on pintrest and remembering I had some industrial themed papers in my stash I made these three.
Using the feeling sentimental set which I think works well against the brick and metal patterns to create some very blokey cards which is often quite a challenge.


The next set were made using the aviary set of stamps. I focused on using the bird cages to create the bottom part of the card a patterned strip is then added and above that the sentiment stamped directly on to the card. Two or three birds are added and the finishing touch of peals or crystals. I like the clean cut classy style of these and the way it works over both the rectangular and square shapes and two different colored bases.

The other crafty thing I have produced this week its this.
I felt in the mood to do some baking and found a recipe for apricot tea loaf in one of my books. its super yummy with a spread of butter and I think I will be making more in future particularly at the rate Alex is munching it.
 I have also started on a set using love and laughter but this isn't finished yet so will be included in the next blog post. I think after this set I might have a brake from card making and move on to creating some everyday felt decorations, my partridges at Christmas were well revived and I have ideas for birds, bird houses and matryoshka doll style ones. I've also completed a crochet garland in spring colors but its waiting to be pressed and not photographed yet. Come back soon for more crafty goings ons.

Friday, 16 January 2015

Another extended crafting session

I normal close my florist shop between Christmas and new year opening up again on the first Wednesday in January when I can get a delivery of fresh flowers in. In my time off I'd planed to have at least one day of intensive crafting on cards ect to make some new stock to sell. However this happened to the shop.
So after yet another flood where the water came three times in just over a week, this picture is from the second lot, It looks like I will be out of the shop until sometime in February. The shop requires extensive  work including a new floor and there is alot of digging work out in the road to fix the large stretch of collapsed drain which caused this devastation. 
So I am using the time wisely and doing as much crafting as I can. 
I started with some cards like last time I have been working in sets as I find this works well for me, Keeps me focused and produces results. 
The first set I made was using the banner blast set of stamps and coordinating punch. I had already made some cards in this style and they had sold well in the shop so I produced more using the new inks and card which I picked up towards the end of last year during a stampin up promotion.They are very rick looking colors and I like the look they create. Another difference with this set to the last one is some of them are on kraft brown card blanks rather than cream this also gives them abit of a different look.  The sentiments are mostly done with the itty bitty banners and coordinating dies I do really love this set and was a good purchase.
 The next set I made was using the elementary elegance stamp set I've had this set for quite a long time but it doesn't lose any of its beauty. Again I focused on the new colors and I like how these mini cards look, look very regal. all but the purple have been stamped color on color which didn't come out to well like that so has been heat embossed in white. Then an punched accent has been added to the middle and a sentiment in the color and touch of gray added to tie in with the crystals.

 Using this set I also made three larger cards with embossed card covering the front before a two layered pendant is added with the cut out frame stamp added and the punched Happy birthday raised on top. I added a little extra shape to each side to define the cut out frame better and to this I added a pearl at each end to bring in a touch of luxury and interest.


For the next little set I looked in to my archive of photos and found I had made a couple like this before and looking at my current paper stash decided I had suitable colors to try this style again. I used the collage curios pretty petites sets of stamps and these work well with the collage look being smaller stamps. Two of the cards are backed in a light brown and done in hues of blue, yellow, green and greens and orange the third is backed in grey and done with pink, blue and grey I feel this one particularly with the use of the floral papers has a vintage vibe.  I will see what sort of reception these get when it comes to selling them and maybe making more in this style.


Next I looked to the set lovely as a tress this has been a staple set of Stampin up range for a long time and is a set many people have in their stash.
I felt at this point I had made quite alot of birthday cards and other happier occasions so I decided this set would be more suitable to make more muted cards. This set of four includes a thoughts of you and with sympathy and are in more subdued colours of shades of brown, green, black and grey. I like the effect of the little squares almost like windows and this was achieved by making the squares and lightly attaching them to a scrap piece of paper in the layout they would appear on the card in and stamping on to the three of them. the image is them stamped separately on to the colored backing card and the squares are removed from the scrap paper and lined up with the other stamped image. It has to be done this way because if they are stamped as one the depth of the squares means the middle portion on the stamp is unable to reach the card to create a cohesive image. they are finished off with a strip of colored card and sentiment.
Also using this set I created these three cards The large tree is stamped on to white and attached to a colored backing card and a complimenting colored card is added to the same color backing card the complimenting card is stamped in small leaves in tone on tone color. A sentiment is stamped directly on to the card in the bottom and a couple of sparkles added to complete the card.
These are all the cards I have done so far but I am sure more will soon follow.


Quick snap of the current cards having their backs stamped with a handmade banner stamp and stamping up logo as per the angel policy all ready for packaging and sale.


Taking a little break from the cards I have produced some of our ever popular friendship teas just a set of nine for now as I have run out of tea bags to pop inside. I tried the pretty petites on the front of three of them for a change and like how they look.


Also been making some of the little decorated tissue pack to sell, these either say Tears of joy and are well suited for wedding or other joyous occasions such as a new birth. Or bless you which are prefect for a thoughtful token to someone who is under the weather. I like the range of colors and styles I achieved in this set giving something for everyone.


So that's the crafting so far I'm sure there will be plenty more before I can get back to the shop and my flowers. Check back soon so see what else is being created.  


Here be dragons

So I fancied a challenge with my crocheting and I'd found this pattern on pintrest quite a while ago to make a dragon or smaug from the hobbit.
I have a friend who really like the Lord of the rings and the hobbit so I thought it would be a suitable Christmas present for her so I had a go he wad done in red and yellow and finished with golden eyes and fierce looking teeth.
Sorry the pictures aren't great. December all got abit rushed and I suddenly realized when I was about to wrap him up that I hadn't taken any pictures.  
Although he does look rather good guarding his minstrels. the legs ares a tad wonky but I think this gives him character.


After completing him I decided to make another one for my sister and her husband they used to own a pair of bearded dragons which they had to remove earlier in the year which was hard for them and sad so I thought a crochet dragon for Christmas would be good.
And here he is again his legs are abit wonky but it just seems to be the way they come out. This one had black beads for eyes and a smile with out teeth to make him look more friendly at the request of my partner.
This one has been called Errol after a dragon who features in the Terry Pratchett books which my brother in law is fond of.
Parts of this project where quite tricky including the changing color mid round which I had not done before I tried several times to do it and always ended up with threads on the outside I think this is because I'm left handed so in the end I made it up the body part with the loose bits criss crossing on the outside then turned the piece inside out.

I think I will have another go at pattern again as my partner would quite like us to have our own dragon he just needs to decide on colors.  

Tuesday, 21 October 2014

And a partridge in a pear tree.

I was getting together quite a collection of lovely colored felt so I thought it was time to make some use of it.
I found a lovely copyright free patteren for an embroidered partridge in an issue of Crafts Beautiful magazine an thought this would be an nice addition to my other felt decorations and would offer a choice between the smaller and more simplistic £3.50 ones and this larger and more intricate and luxurious one. 
I started with cutting several sets of each color and then mix and matching the pieces until I was happy with the color combinations. I tried to keep a structure to how I put the colors together, each partridge has a cream front body and the back is a color which matches the head piece the neck piece and tail piece also match in color and the beaks were done in either yellow or orange depending on if orange featured anywhere else on the design.
 The pieces were then stitched on to the cream body using a mixture of running and over stitching, I used two strands of embroidery cotton in complimentary shades. the edges were left un-stitched as these would get stitched when the front was joined to the back.


The embroidery was then added using back-stitch to create the patterns on it again using strands of embroidery thread in compliment colors, I tried to stick to a set number of colors and combinations to give the piece a themed look. The eye was worked in satin stitch and I think I prefer this than adding a button or bead.


I then added a ribbon which can be invisibly stitched to the neck if worked carefully to only catch on the cream felt and not the layer above.  I choose to use a folded ribbon creating two loose ends instead of a loop as I felt this gave more choice to the buyer as to  how and where the finished decoration could be displayed. It was then stitched to the back piece using cream thread and an over stitch and stuffed with a polyester stuffing which gives it a lovely plush shape.


I think they look really lovely and are perfect for someone looking for a different and unique decoration. And I hope the color choices appeal to people.


The partridges have now found a home in my shop displayed in the craft focus area resting on some Christmas trees and are available for £9.50 each.


Monday, 22 September 2014

More felt Christmas decorations

So I said in the previous post there was two sets of felt decorations here's the other.

 This set is called baubles because they are more traditional bauble shapes. For each shape I've made four decorations two with ric-rac and two with buttons the pairs mirror each other in colour.
So up first is the round shape the ric-rac pair have been made using deep purple pink and turquoise blue with navy ric rac.

 For the button pair of the round set I've used lilac and the deep purple pink for the decoration I've added three tiny buttons and a felt holly leaf. On the button decorations I've put the second colour on by making the same shape in a smaller size.


The next shape is a pointy oval I think this is my favorite shape of the three its got a vintage look about it. For the ric-rac pair I've worked in traditional green and red with cream ric-rac.


For the button set I've worked in yellow and turquoise blue with buttons on. I like the yellow button with the tinsel bits in on the other half of the pair. Like the other set they are hand-stitched and with out stuffing which makes them perfect for posting as a little gift for someone.


The last shape is circle with bobbles on the bottom. for the ric-rac set I've worked in yellow and lilac with red ric-rac. On these style ones the second colour has been added in the form of a band which is rounded to give them a feeling of shape.


And the last button ones are worked in red and light blue this is a colour scheme I do see coming in to trend its a progression from the red and white rustic scandi style that has been popular for the last few years. These are decorating with a large pattered wooden button.


So that's the second set so far of felt decorations gong to be available soon at £3-50 each.

Christmas crafting in August

I know I know seems mad but if your gona sell craft you have to be ahead on the seasons so I started making my felt Christmas decorations while I was out of the shop due to the flood.
I see the ones I've made so far in two sets so will be doing two blog posts about them.
The first one is called Shapes, these are decorations shaped like traditional Christmas things this set began life last year as some gingerbread houses I made while on a trip to my in-laws, they sold well so I've made some more.

These are the ones from last year.
So new shapes for this year start with Christmas puddings these have been done in two different shades of brown and decorated with contrasting embroidered stars, white felt icing and green bow with button. I've done some with the gingham ribbon and some with a dotty ribbon.

The other shade of pudding


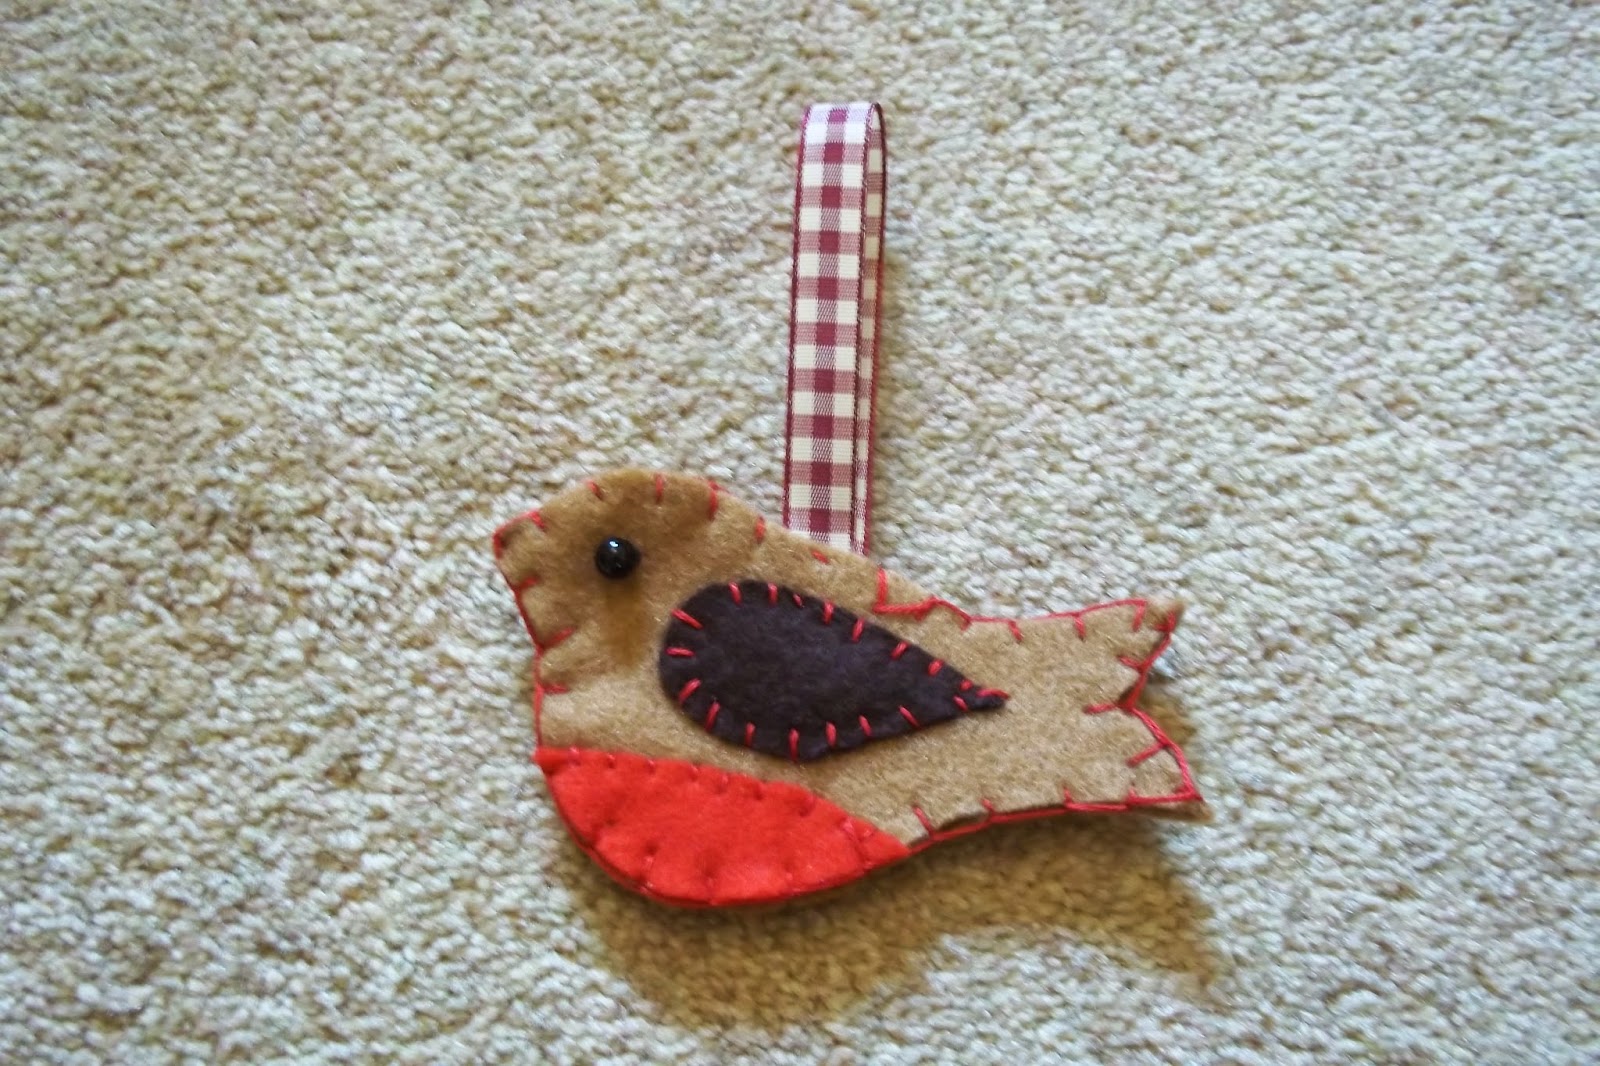
 Then we have some cute little robins these are stitched in festive red and finished off with contrasting wing, red belly and black bead eye.


 Some look left and some look right. All my felt decorations are hand-stitched.


 And last in the shapes set, for the moment is this terrific two tone holly leaf which is finished off with vein stitching and mini red pom poms.


So there you go my first set of felt Christmas decorations for this year.


Tuesday, 9 September 2014

Christmas Craftstyle samples.

I've been a design team member for Craftstyle products for a while now and recently they sent me a selection of their Christmas products to make some samples and here they are.
Lets start with a simple easel card, this style has been in fashion for a while and I have to wonder how long it will stay popular. The card base I used had an embossed front with a snowflake pattern so I used some more embossed card to match it. A strip of tartan patterned backing card (I say card because it is a good thickness) is placed on the topper with matching piece on the base. The main topper which has a foil edge is placed on top of this and a set of banner strips are layered up on one side to create a backing for the sentiment. A stopper is also created with foam pads on the base section.


Next is a large gate-fold card the toppers used on this card have a religious theme depicting the first Christmas. I really like these toppers as its nice companies offer religious themed Christmas items as well as the traditional snow and Santa.  These are in neutral browns and creams which look abit like fabric with button details which when well with the cotton and button tie I made for the card.


The backing papers were from some paper pads craftstyle are doing the paper is thinner than they usually do but is still good and has a glossiness to it which gives a nice effect there are two pads one in the brown and cream colors and the other in reds and green. both compliment the range of toppers well.


Next is a side stepper card the base is created with holly embossed card, craftstyle do a great range of embossed card is so many different patterns. This is topped with another tartan patterned backing card which I was loving as when I was doing these I was close to going up to Scotland for a friends wedding. Post box toppers were added again with lovely foiling detail on the edge.


A side view showing the stepper element of the card which adds depth to the design.


This card showcases the patterned paper packs I mentioned earlier. A card base with foiled red dots on is used as a backing for this Christmas tree design which is created with overlapping strips of paper with a mixture of patterns on including snowflakes, stars and dots.


When creating my craftstyle samples I do try to push the boundaries beyond just standard shaped cards to do these products justice and show they are not just for card makers. Here is a lovely hanging Christmas decoration made with paper rosettes created with papers and backing card the top one is finished off with a button but the larger one is finished off with a star from the patterned paper which is punched out in a circle and at the bottom a round shaped card with green foil dots is topped with a cute west highland terrier topper and sentiment.


The last sample is a cute little pocket card which I found instructions for here. The main body of the pocket is created with a piece from the paper pad and a belly band of backing card with a decorative punched edge is added round and a sentiment attached to this.


The tag for the inside is created from the same backing card as the band and a topper is added to this I think the Santa with his finger to his lips really works for this style of card. a hole is punch through the top and a matching circle of the pocket paper and ribbon is added to finish this off.


I hope you like these samples and they show a range of styles and designs for Christmas hopefully these will be used when Craftstyle do a show on Create and craft to showcase these products.