Monday, 2 June 2014

Latest craftstyle samples.

Craft style products have expanded their cut and create range here are the samples I made with the new designs.
 I decided to be more creative with the shape of my cards for this set of samples.
So here is the first one for this I stuck together two square cards the cut away slanting portions of two sections to create the zigzag. I then layered them with backing paper in this red industrial look, (which I think is great for boys cards) and topped it with one of the new dinosaur designs and sentiment.


The next card was a card in a box which is becoming a popular style of card. I found instructions for this here a very clear and comprehensive tutorial. This card featured one of the new robot designs and I felt the style of card went well with it. I enjoyed making this style of card and look forward to doing more like it in future.
 The next card is a style I've been wanting to try for a while, a lever card. It has taken me quite a while to find clear instructions I have found some here they are no in English but the pictures are easy to follow. I used two square card blanks to make this and covered them in different backing papers and added an assembled topper and sentiment.   I have added a couple more photos of this card so you can see how it folds.


For change from just cards I created this cute door hanger. I stuck together two pieces of the backing paper, (which is quite thick so is sturdy enough) and then decorated is with monkey toppers and stamped my own cheeky sentiment. I think its all rather cute and shows that you don't just have to make cards with this products your and expand and do home decor bits too.


My last two cards are abit more normal this purple dinosaur is put on an easel card. With backing paper and sentiment creating a stopper.


And this one showing the other robot design is on a normal card blank, I will say that these designs do make quite large toppers, and are very bold and bright, excellent for children. The photograph doesn't show it very well but some of the white patches on this card are a complimenting embossed card with a zigzag pattern on.


So there you go samples done and sent back to craftstyle.
More crafting coming soon and not too but longer before the bumper blog about all the crafting I have been doing to help with my sisters wedding.

Tuesday, 6 May 2014

Say hello to spot

Sorry for not blogging for a while been busy with work, wedding stuff for my sister and changing computers.
                                                                                                                   
So still busy crocheting I picked up this brilliant set in Hobby Craft to crochet a giraffe.
The kit was brilliant can with full clear instructions, a crochet hook, large plastic needle and more than enough wool and stuffing.


 I got cracking on him, you make four individual legs first and sew them together you then crochet the rest of the body and neck on to them stuff as you go along.

The head is then made and stuffed and the ears and horns made separately and sewn on before the head is attached to the neck .


And here is the finished chap we called him spot.

Since making spot I've also created another giraffe in DK cotton in yellow, brown ,white and green stripes for my sister. I found the cotton makes him abit stiffer which helps with the standing up.

Hoping to create more of these in different colors to have on craft stalls at events.

Tuesday, 18 February 2014

The one I love.

With the rush of Valentines day now over in the shop I've got time to do a blog post about the card I made for my beloved.
The large Love in the bottom right corner is done using some free stamps I got with an issue of Simply Homemade, its a Kirstie Allsopp clear stamp set and I like how the four letters are all separate so I can place them vertically like on this card or horizontally or in a square.
The banner part of the card is make using some products from my latest Stampin up haul. The Banner blast stamp set and coordinating punch are both part of the Sale-A-Bration  promotion I placed the punched out flags on foam pads over some bakers twine which is stick with a bow at each end.
The card is stamped using my new  stampin up ink pads in Strawberry Slush, Baked Brown Sugar and Pistachio Pudding. I like the colour scheme it says valentine without being the traditional red giving it more a quirky fresh feel.
All in all I'm pleased with this card and it was well received.

Tuesday, 28 January 2014

Craftstyle Occasions Samples

I've done a few more Craft style products samples which may be part of show going out on Create and craft on the 1st of February.
This range is called Occasions and is a selection of die cut toppers and coordinating backing sheets. The range includes, Valentines day, Mothers day, Easter, Fathers day, Wedding, Sympathy and Get well soon. Its nice to see a kit that give you these different themes, there's a lot of Birthday stuff out there already.
So on to the samples I made,The first one is from the wedding theme, I created a side stepper card from a piece of dot embossed card then used the backing sheet to cover the front section and across the back step, I also ran a thin strip of the embossed card across the front. Toppers were added to the large front section and the middle step and the card was finished off with some little hearts, also from the die cut sheet. I like the colours of this theme and think the bird motifs are right on trend, the foiling also gives it just the right amount of sparkle.
For this card I used one of the bases I was supplied with one side of which was purposely smaller than the other. (I'm personally not sure why so going to see if they are on the show and explained). I made the two sides the same size by adding a piece of striped backing paper from the sympathy theme to the back of the front side I then added another smaller piece to the front to create a layered look. On the topper sheet there is several sizes so I drew around one of the bigger ones on to white card and cut it out so it could frame the topper I had chosen to use. The corners were adorned with little flower embellishments.
The muted cool colour pallet of this theme works well for sympathy I think.

Another unusual shaped card this time a double easel card. Again I have used embossed card to make this base this time with a star theme to be in-keeping with the Fathers day theme. One side of the easel has a large topper on and the other a smaller topper with dot embellishments, which I added sliver stars to. the bas of the card has some of the backing sheet which matches up well with the larger topper, the stop for the easels is created using some of the boarder strip that comes on the backing sheet and more stars are added to the corners to keep up the red and blue theme. This is a fun theme with strong male colours and on trend moustache graphic.          
With the Fathers day theme there is also a Mothers day sheet, which was used to create this card.  For this I used some of the back sheet, a crisp bright pink polka dot. I placed strips paper shaped at the bottom to play on the bunting trend this also has the added benefit of filling a lot of the card while using the patterned paper economically (everyone wants to get the most out of everything.)  The sentiment topper is added to the bottom corner and a strip of boarder from the backing sheet is placed across the banners. I added a circle of mirror card and a paper flower to one of the die cut flowers off the sheet to finish off this card.

The last sample I did in this set was a simple Easter card. I took one of the larger topper and cut out the bunny on another so with some foam pads could create some depth to the topper. I also added some gold card to the back of the sentiment so it ties in with the gold foiling on the other elements.This sheet also has some cute chicks on it.

So look out for my cards of the show.

Thursday, 16 January 2014

Further exploits in to crochet.

In the past I've blogged about making a couple of crochet blankets and some cute little owls.
Over the Christmas break I found time to try a few more bits and pieces.
First up some more granny squares but in different patterns to the standard treble blocks. These came out of a book I was given for Christmas by a friend,Granny Squares 20 crochet project with a vintage vibe. This is a brilliant book that I'm sure I will be creating lots out of.
This first one is a square with a circle inside I like this pattern and think its would look good in a mixture of colours.
This one is a hexagon shape one, I was really pleased to be able to follow this pattern to achieve something that wasn't just square.
Another square one, the pattern said this should have been done on a bigger hook than I had available so its abit squashed looking, its a flower within a square, I'm pleased with how I was able to interchange the colours on this one.
A pretty flower/star shape, I like this one and think I will be trying it later in the year with a smaller hook and daintier white and silver cottons to create snowflakes.


The last one for now out of the book that I tried was this coaster mat, I chose to do it in a finer crochet cotton instead of the wool and really pleased with the effect, it compliments the lovely scallop work and holes.


All this experimenting reminded me of a pattern my mother had purchased a while back so I dug it out and had a go at some of the things on it. The pattern was from stylecraft kon tiki crochet range, which I believe is now discontinued.
 The first thing I tried was a flower that was used on a hat and scarf and as a bag. This flower has a lovely layered effect which is created by working in to the back of the piece of work instead of just going around the outside, it is abit fiddly to do but worth it.
The other thing I had a go at was a different flower which on the pattern was used to decorate a bag. this is a cute little flower and I added beads and a button to it along with a pin on the back to create a brooch.


Sticking with the theme of flowers I had a go at these lovely 3d roses. I adore making these so simple yet they create such an effect. I found the tutorial for them on the Simply homemade magazine site. Tutorial Tuesday-crochet-rose this only shows you how to make the roses the leaves I adapted from leaves in the above mentioned stylecraft pattern. I think I'm also going to sew these on to brooch pins to sell on craft stalls.


And my grand finale in my recent adventures in crochet, dino the dinosaur, I got the pattern for this from a branched off magazine for Simply homemade, called Handmade Gifts for girls and boys. I think hes super cute but did take me a day and a half solid crocheting, there are two other styles to make in the magazine a t-rex and triceratops. I've started having a go at the t-rex but I think there is an error in the pattern and need to contact the company that prints it.
So there you go my recent goes as crochet, I really feel I'm progressing and getting along well with this craft really glad I've persevered with it.


Saturday, 11 January 2014

Things I should have blogged about in 2013

I find that sometimes time gets away from me and although I've done some crafting and even got photos taken I don't get round to blogging about it so here's a bumper post of all the things I should have blogged about in 2013 with a vow to try blog on time about things in future. 

 I took part in the village craft and produce show again entering seven categories. First was greeting card, I did a Christmas card in the stepper style grey base card was scored and folded to create three levels which I decorated using stampin up stamp sets lovely as a tree and Christmas deer, I used silver and white embossing powers to make the images really stand out against the grey. I enclosed all this in a folded piece of acetate with has a random white dot pattern on it emulating snow. I finished the front off with a silver Merry Christmas sticker.  This won second place.
This is my entry for the bookmark category Its quite a simple thing a couple layers of rectangular card and then decorated with punched out circles of patterned paper and stamps. the top has an added tag and the bottom a decorative piece of card with ribbon. This didn't place and was done more as a filler entry.  
 My entry for the photography category a Lincolnshire scene. A photo taken down the coast abit while on a picnic with friends I was always pleased with the contrast between the sky, clouds, grass and sand and was even more pleased when it won first prize.
My first crochet blanket entered in to a stitched item,  I did have other plans for this category but time got away from me as usual so I just popped this in, it didn't place as there were many far superior entries , there's some very talented sewers and quilters around here.
My entry in to flora arrangement, a modern style arrangement of blooms, orchids, bamboo and fatsia leaves. I love the big bold blooms in my favorite green colour and the exotic orchids and the flow they create worked on to the chicken wire, framed by the glossy leaves. this was very well admired and won first place.
This was a fun entry of garden on a dinner plate, unfortunately this category didn't have many entries, but I'm still rather pleased with my carnation sheep,  sedum bushes, daises created with tiny pieces of September flower. A cute little arrangement that got me second place.
 And my last entry one for the food categories, three cookies on a plate. I did my signature chocolate chip they don't look overly impressive but have a brill taste. They got me another second place.
Quick snap of my little certificates all in all a very good show and pleased with my haul of prizes. 


 I should have also done a post about my second crochet blanket, this was a commission from a friend of my grandma who saw the first one I had done and jokingly said, do you think she would miss it that would be lovely for sitting with in the winter so I said I could do her one if she would like. The lady likes alot of colour but I'm quite pleased with the end result, I did one chain stitch instead of two between each treble block and think I picked up my 3.5mm hook instead of my 4mm hook resulting in slightly smaller squares than the first blanket but a neater finish. In a bid to get this finished before it got too
cold I was working on these little squares every where including a scout training weekend which got me some funny looks but admiration of my spare time being put to good use. 


Baking exploits, throughout the year in general there probably  should have been most posts about my baking but often the items were consumed before I had chance to photograph and blog.
Any here's some pictures the first one is of some cupcakes I made to give out to my choir ladies as our practice night fell on my birthday. They are taken out of a craft magazine, and have a rich flavour as they include, orange juice, golden syrup and treacle, and various spices, the frosting is made with full fat soft cheese icing sugar and lemon, I decorated them with sprinkles that looked like little gingerbread men and they went down really well with everyone. The recipe was abit of a faff, lots of measure this stir this melt that but the end result is worth it.  
 This quick snap is of a cake I made for the birthday of my other half's grannie. Just a plain jam sponge but I was rather pleased with my decorative birthday banner on the top of it.
Also in baking news last year a purchased a cool silicon mould from Lakeland. It makes buttons !! and can be used for icing or chocolate. I look forward to using it to decorate many cakes, this batch of chocolate buttons just got eaten though. 


My last picture is of some adorable felt houses I made for Christmas decorations. These are all hand stitched and really enjoyed designing and making them and think I will be making more felt decorations throughout this year. These a finished off with gingham hanging loops and patterned buttons. I sold them in the shop and were a big hit. 


So there you go a few crafting things from 2013 tidied up before we start another year of creative craft makes. My Sister is getting wed this year so will be doing a blog post wedding of all the creative bits and pieces I've been helping her with, look forward to that. Happy Crafting 2014. 

Thursday, 7 November 2013

Craftstyle samples vintage florals.

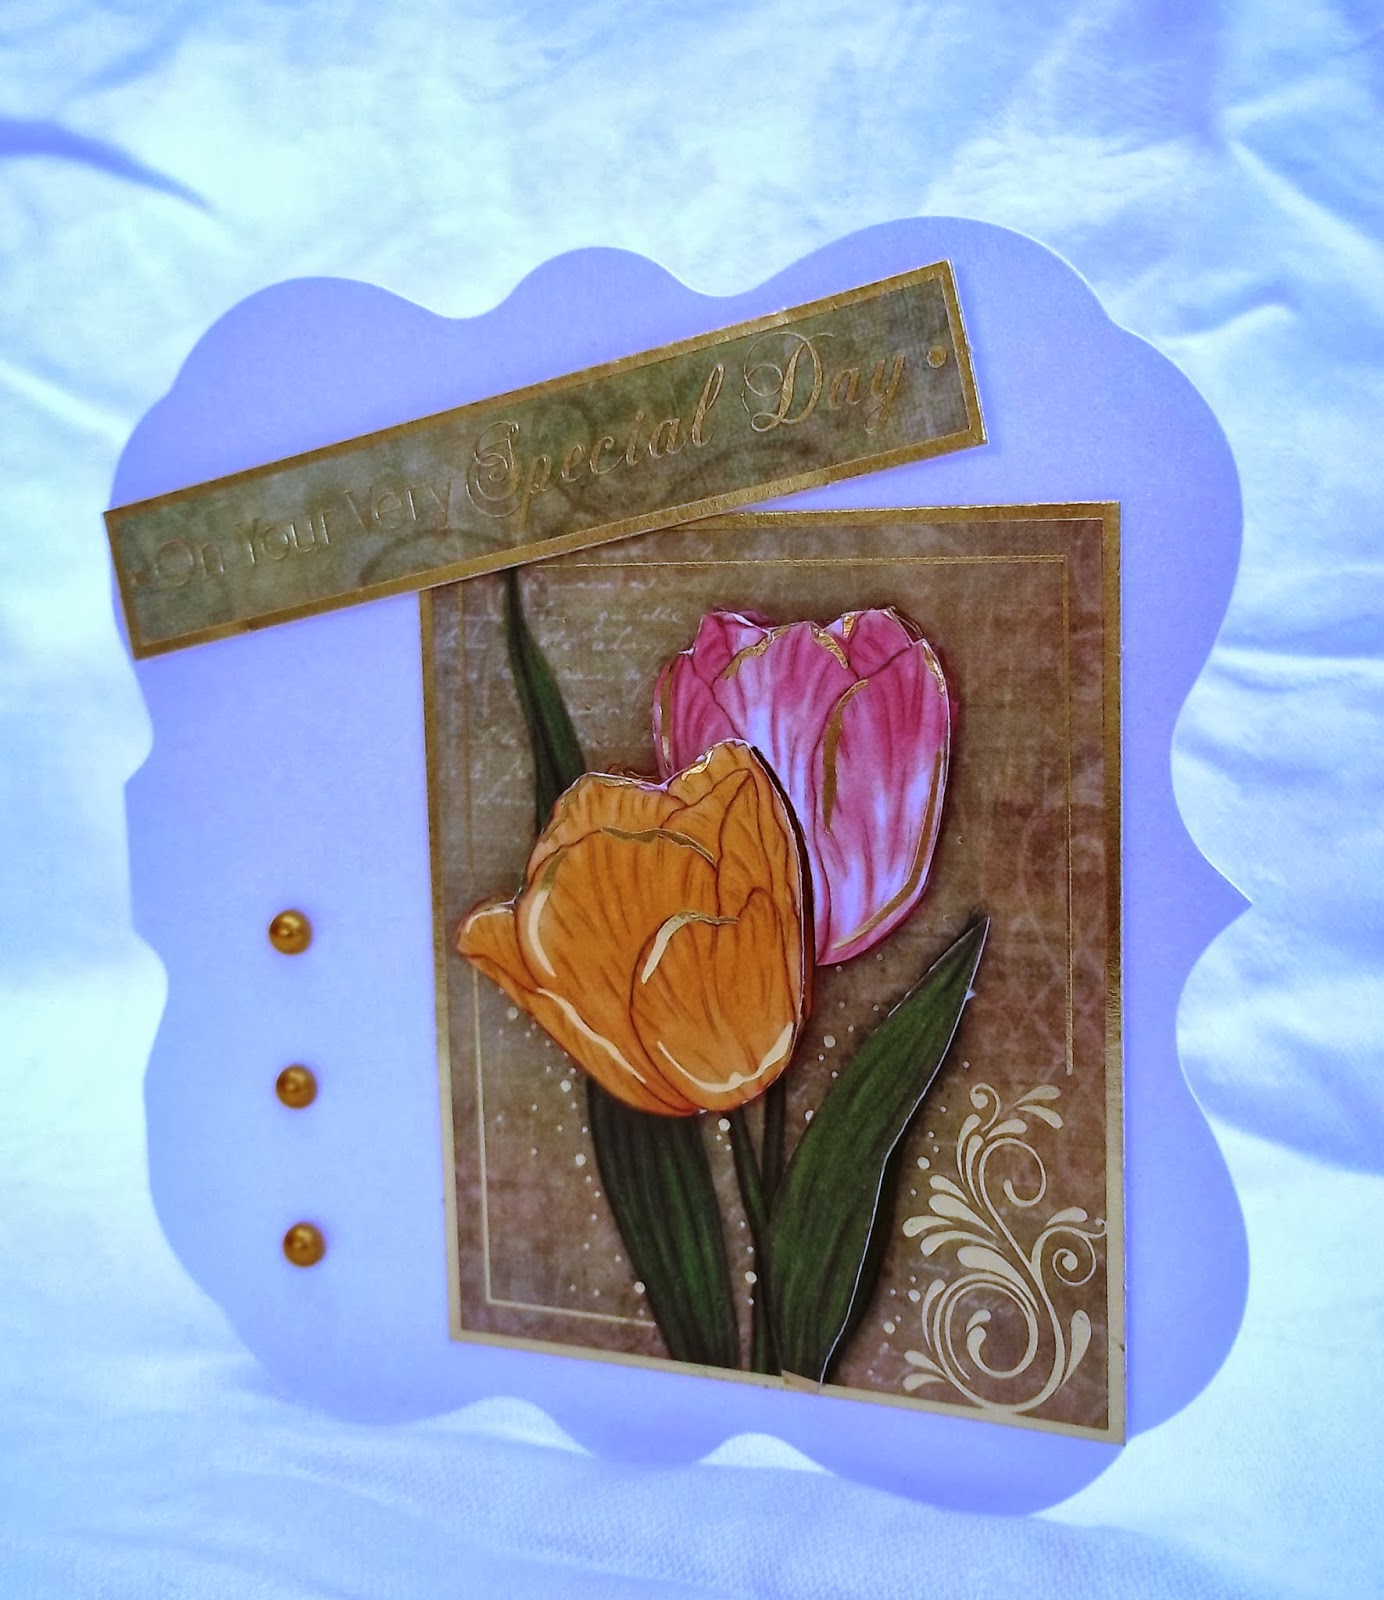
I was sent some items this week by craftsyle products to make some quick samples ready for a show on create and craft this weekend. The range is called vintage florals and consists of four flower themes I was sent two of the lilies and tulip which each have toppers in a range of sizes and selection of sentiments, they are precut toppers which is handy for creating something quick and are or a very good quality card with gold foiling detail. there is also a section of  in-keeping and delightful backing papers.
Here's what I created with them.

This first card is a portrait card with a scallop edge on to which I have placed a strip of one of the backing papers edged with a gold coloured paper out of my stash. On top of this is placed one of the toppers medium size with a sentiment on top of that affixed with foam pads to give it some depth. I then cut out one lily head from another topper to place in the bottom corner.


The next card has a pre-shaped base and is made of a pearled card so I haven't covered it up with lots of backing paper. I took one of the smaller tulip toppers and as the sheet has two of this size I cut the front leaf and two flower hears from the second one, I shaped them abit using an embossing tool on a soft surface. I'm very pleased with the definition this gives, I then attached these to the topper with foam pads. A sentiment is placed across the top corner and is it is finished off with three gold pearls.


The last card I made is done on a stepper base.
I have created a stopper for it using textured card and a sentiment which is raised on foam pads.  Some textured card is also used on the base of the front section of the card to continue the theme. the main front section has a lager sized topper placed on it with a verse sentiment across one corner the back side panels have had one of the backing papers added to them which pick up on the  handwriting theme on the lily topper.


All in all I'm pleased with these three samples and hope to catch a glimpse of them on the show.